Set Up a Streaming Media Server – Pt. 2 – Configure Network
At this point, you’ll want to log into your server. Enter in the username you chose before, hit enter, then put in the password. You’ll notice when you are entering the password that the cursor does not move. That’s just the nature of password entry in Linux.
Once you’re logged in we’re ready to start setting stuff up!
Static IP
You’ll want to give the server a local static IP. This makes it a lot easier to manage and prevent you from running into weird issues.
By default, your router is most likely handing out IP addresses using a DHCP range of IP’s. For example, if your local network is set up to use 192.168.1.1 – 192.168.1.254, the range of IP’s that the DHCP service automatically assigns may be 192.168.1.100 – 192.168.1.254, but this depends on the default settings of the router or any configuration you may have done. You’ll want to log into your router to check this out.

Once you know the range of IP’s your router is automatically assigning to machines, you can safely choose a static IP for your server that won’t conflict with any dynamically assigned IP’s on your network.
For example, on my network, the DHCP server on my router is automatically assigning addresses between 192.168.1.100 and 192.168.1.149. I want to choose an IP for my server that does not fall within this range. My router is already set up to use 192.168.1.1. I could set the server to use 192.168.1.2, but if I were to add other networking gear like an access point or something, I’d need to make that 192.168.1.3, and that’s just weird to go .1 = router, .2 = server, .3 = AP.
I mean, there’s nothing technically wrong with doing this, but for best practices, I like to give enough room in my IP range planning to organize my devices. A better way would set the server to use 192.168.1.10. That way if I added more networking gear, I’d be able to put them all together in the .1 – .9 range, and all my servers could be .10 – .19, and any other category of static devices (maybe printers?) could use .20 – .29, etc… It’s just good to think about how you’ll plan out your network when you’re setting up devices to use static IP’s. With all this in mind, we’ll assign the server an IP of 192.168.1.10.
So how do we do this? Just about all configuration in Linux is done through editing certain files, and that’s exactly what we’ll do here. We’ll use a text editor called Vim. It’s a little tricky at first and you’ll need to make sure you’re in the right editing mode.
To edit the file that controls our network interfaces, we’ll need to enter this into our prompt.
sudo vim /etc/network/interfaces
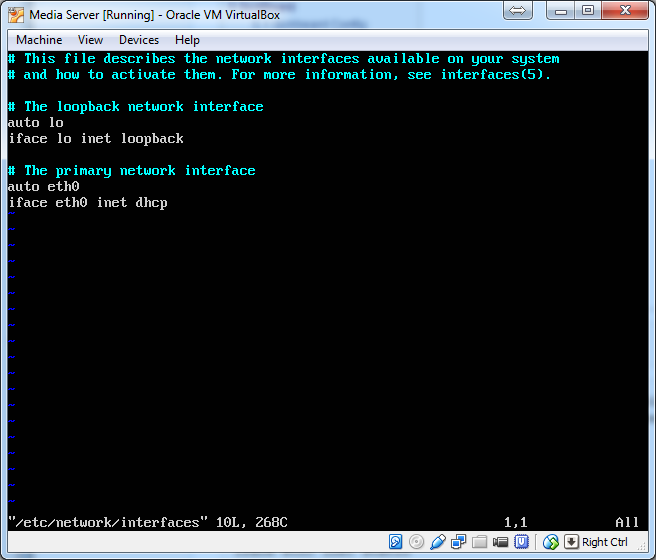
Put in your password and you’ll see something like this:

Then we’ll edit the information for our ethernet adapter (and we’ll need to add information for our second one). To edit the text, you’ll need to get into Insert mode. To do that, you’ll need to press the A key on your keyboard. You’ll see on the bottom left it now shows — INSERT —. Use the arrow keys to move the cursor where you want it to go.
If you ever screw up the file so bad you want to start over, you can exit without saving the changes. First, hit the escape key on your keyboard to make sure you aren’t in insert mode, then type
:q!
That’s not a smileyface. It’s a colon, a Q, and an exclamation point.
Once you’re done editing the file, it should like this:
# This file describes the network interfaces available on your system
# and how to activate them. For more information, see interfaces(5).

# The loopback network interface
auto lo
iface lo inet loopback

# The primary network interface
auto eth0
iface eth0 inet static
address 192.168.1.10
netmask 255.255.255.0
gateway 192.168.1.1
dns-nameservers 8.8.8.8
When you’re done making your changes, hit the Escape key to get out of Insert mode, then press Shift+zz (as in, hold down the shift key, then hit the Z key twice). After that, you’ll want to restart the VM.
sudo shutdown -r now
Leave a Reply